
本文主要介绍如何使用IAR Arm工具链在GD32开发调试Zephyr RTOS。
准备工作
- Zephyr 入门: 建议参考Getting Started Guide — Zephyr Project Documentation
- IAR Embedded Workbench for Arm (9.70.1版本开始支持Zephyr)
- GD32 Zephyr 开发入门:建议参考https://github.com/GD32-MCU-IOT/gd32_zephyr/blob/main/gd32mcu_zephyr_get_start_cn.md
使用IAR Arm工具链GD32 MCU Zephyr 开发入门指南
1.开发环境
操作系统:Windows 11
命令行工具:Windows PowerShell
IAR Arm 工具链:EWARM 9.70.4
硬件开发板:GD32H759I_EVAL
2.安装系统依赖
首先安装 Zephyr 开发所需的系统依赖包:
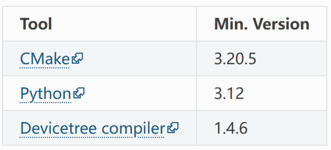
可以通过https://docs.zephyrproject.org/latest/develop/getting_started/index.html 的步骤进行安装。关键组件CMake,Python,Devicetree compiler的版本最小要求如下:
安装完成后,可以通过如下命令进行验证:
# 验证 CMake 版本
cmake --version
# 验证 Python 版本
py --version
# 验证设备树编译器版本
dtc –version
3. 配置 Python 环境
3.1 创建 Python 虚拟环境
# 创建虚拟环境目录
mkdir -p ./zephyrproject
# 创建虚拟环境 (指定使用3.12版本)
py -3.12 -m venv ./zephyrproject/.venv
# 激活虚拟环境
./zephyrproject/.venv/Scripts/Activate.ps1

3.2 升级 pip 并安装 west
# 升级 pip 到最新版本
pip install --upgrade pip
# 安装 west 工具
pip install west

3.3 验证 west 安装
# 验证 west 版本 (west版本应为v1.5.0以上)
west –version

4. 获取 Zephyr 源码
4.1 初始化工作空间
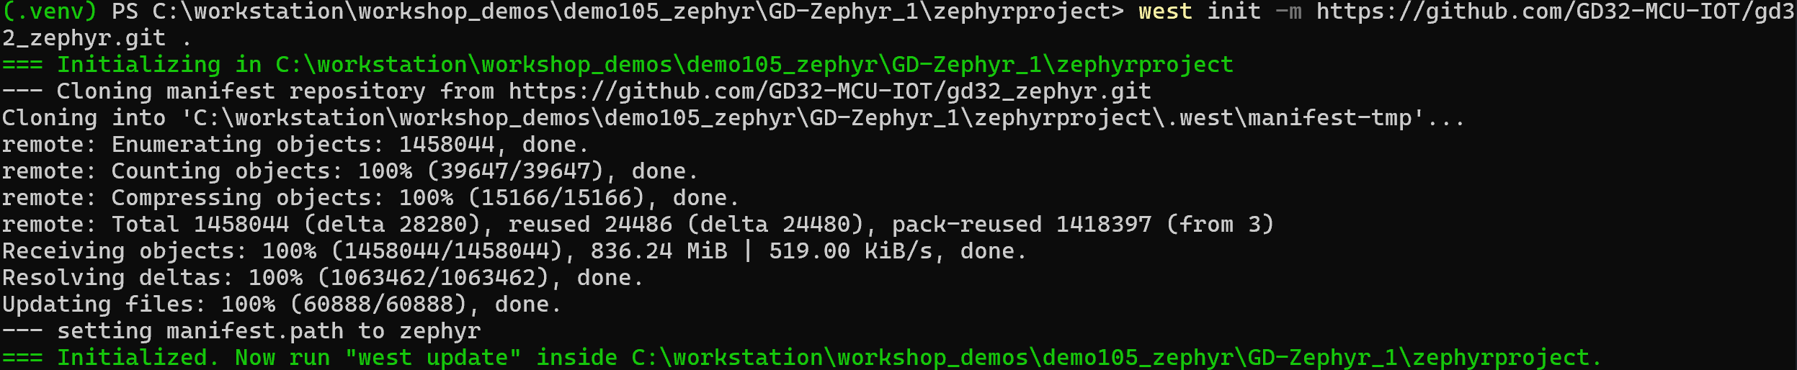
使用个人定制的 Zephyr 仓库初始化工作空间:
# 创建项目目录
cd ./zephyrproject
# 使用个人仓库初始化 west 工作空间
west init -m https://github.com/GD32-MCU-IOT/gd32_zephyr.git .
4.2 导出Zephyr CMake包
#导出 Zephyr CMake 包。这允许 CMake 自动加载构建 Zephyr 应用程序所需的样板代码。
west zephyr-export

4.3 更新所有模块
# 更新所有 west 模块
west update
这个过程可能需要几分钟时间,west 会下载 Zephyr 内核和所有必需的模块。

5. 安装 Python 依赖
# 进入 zephyr 目录
cd zephyr
# 安装 Python 依赖
python -m pip install @((west packages pip) -split ' ')

6. 安装 Zephyr SDK
6.1 下载并安装 SDK
# 下载 Zephyr SDK(版本可能会更新,请检查最新版本)
west sdk install

如只需要下载安装Arm GCC工具链,可以使用以下命令
west sdk install -t arm-zephyr-eabi
7. 环境设置
每次重新打开powershell,进入开发目录时,需要设置 Zephyr 环境:
# 激活虚拟环境
./zephyrproject/.venv/Scripts/Activate.ps1

8. 验证安装
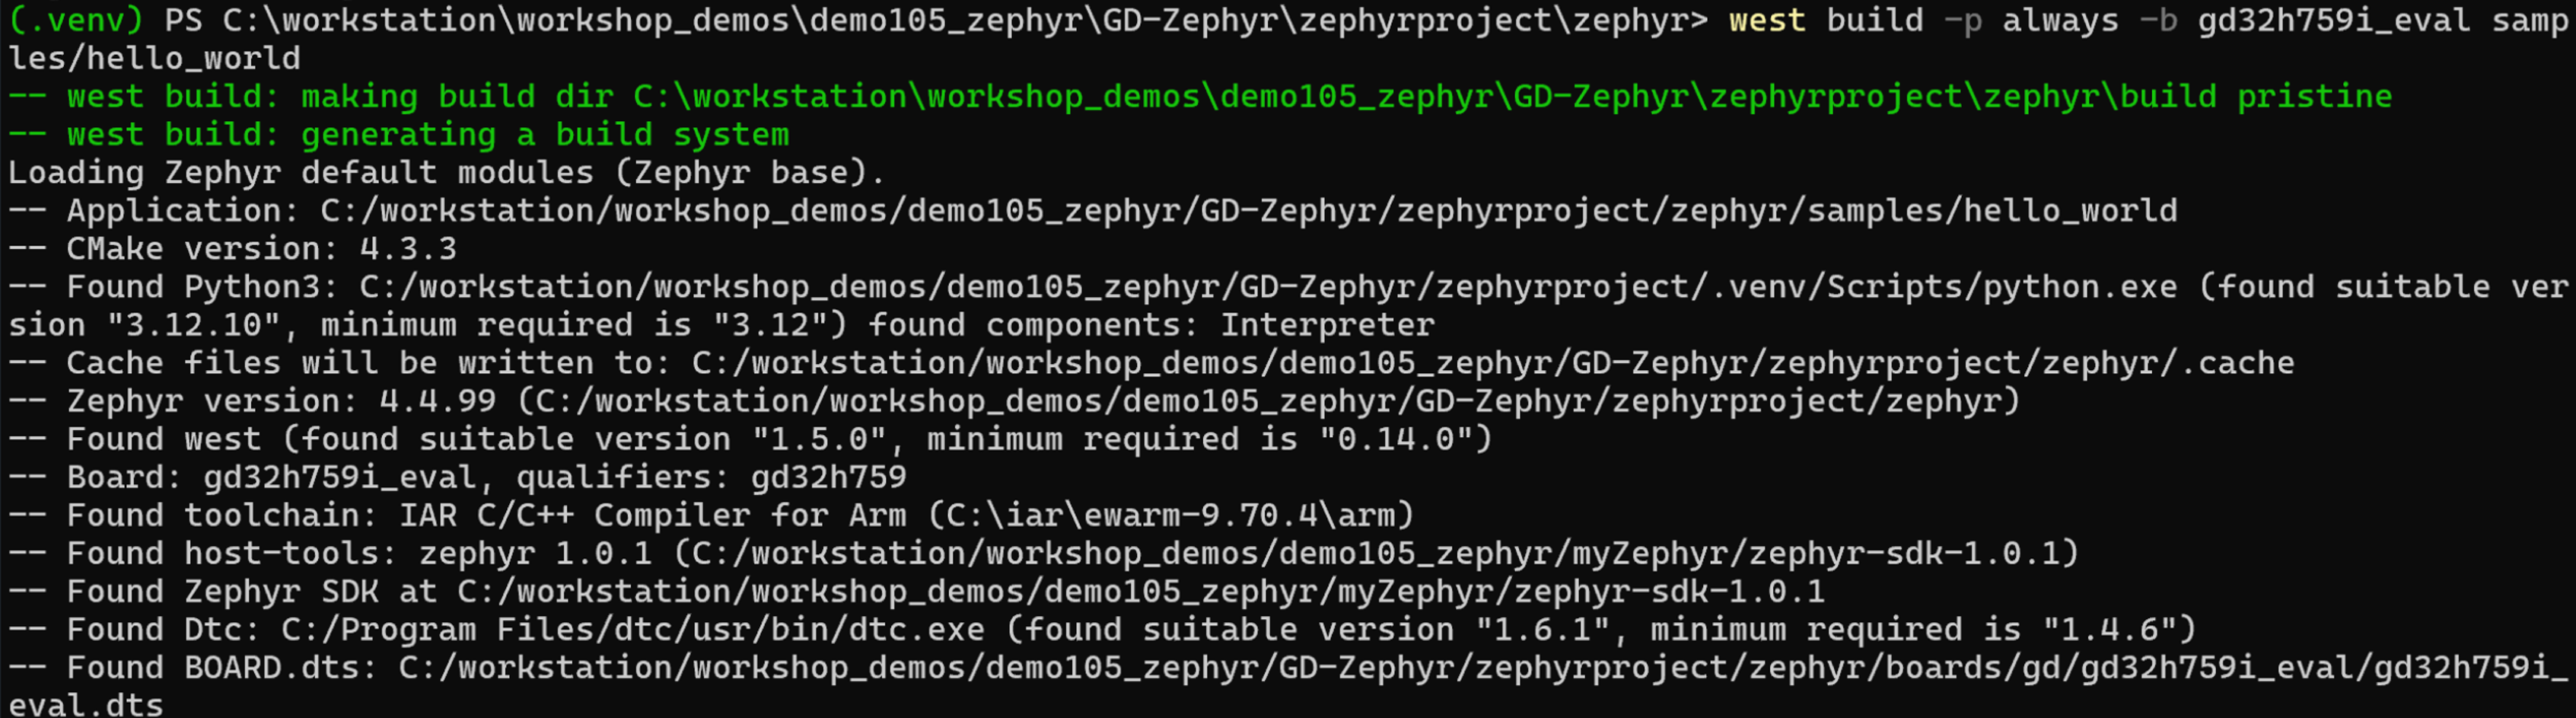
8.1 构建示例项目
# 进入 zephyr 目录
cd ./zephyrproject/zephyr
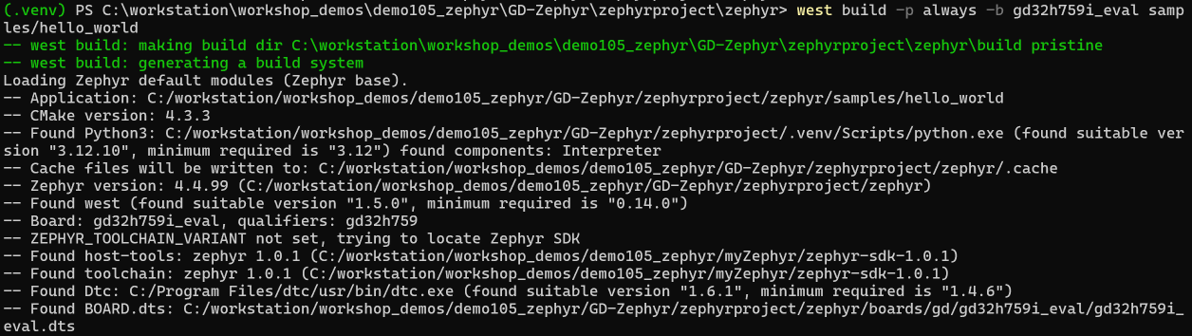
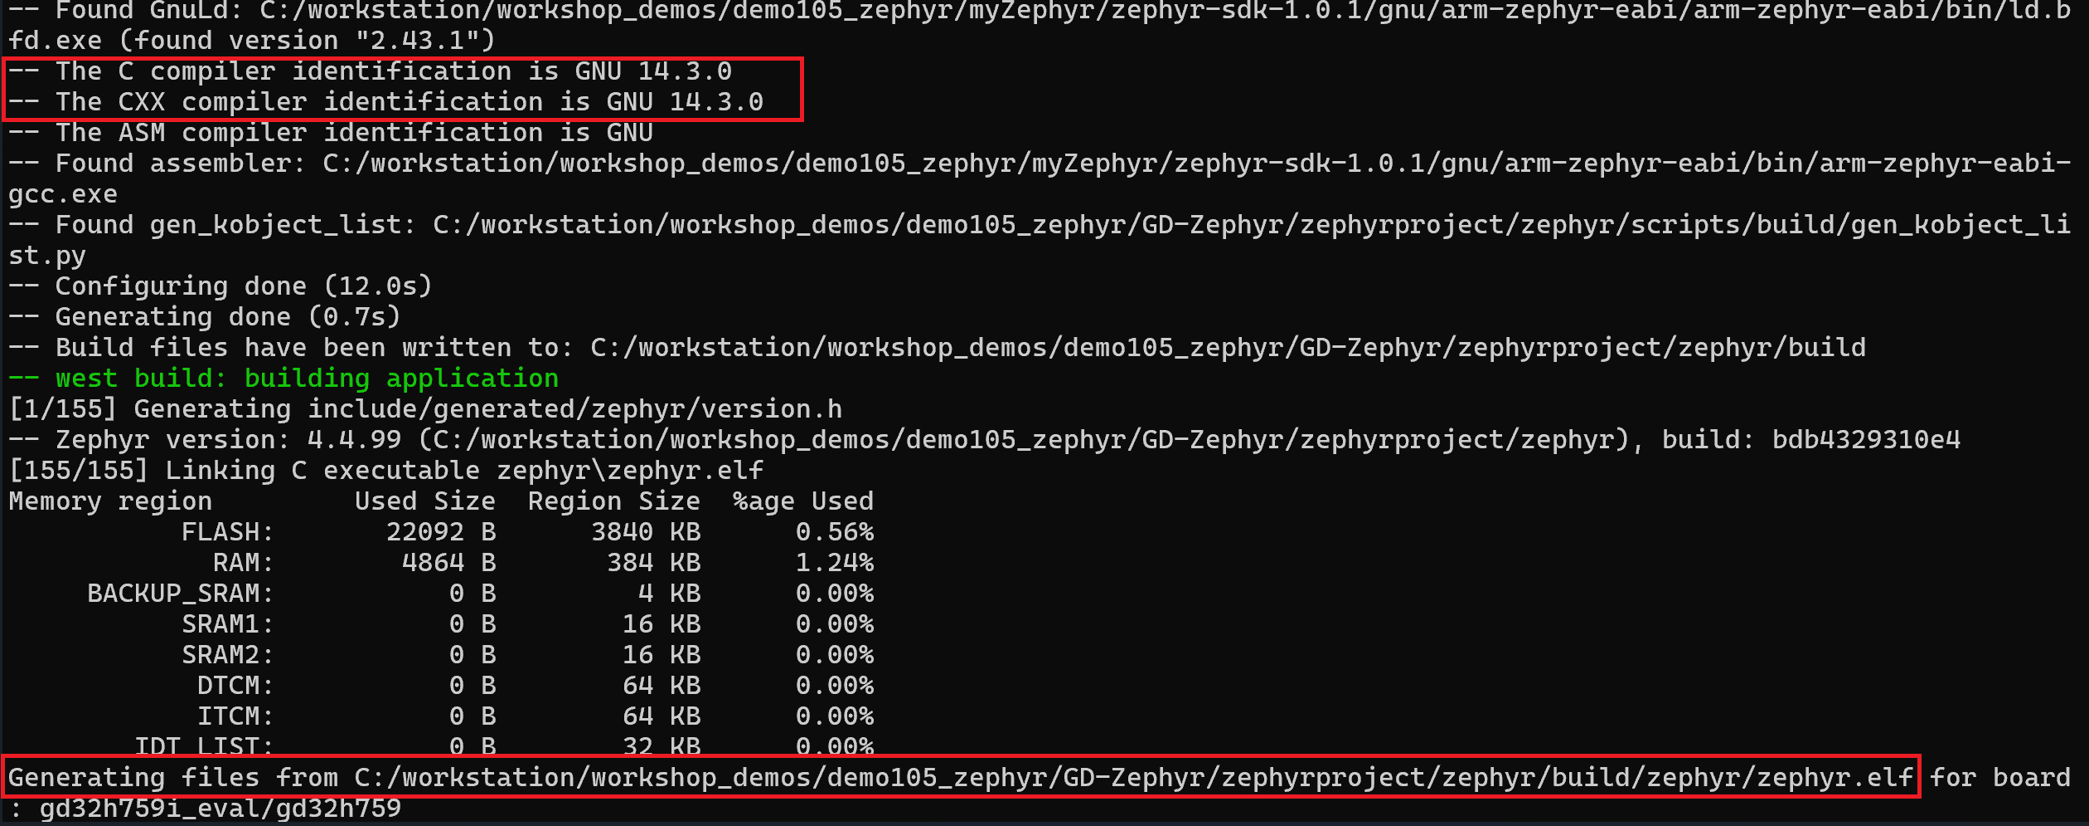
# 构建 Hello World 示例(以 gd32h759i_eval为例)
west build -p always -b gd32h759i_eval samples/hello_world
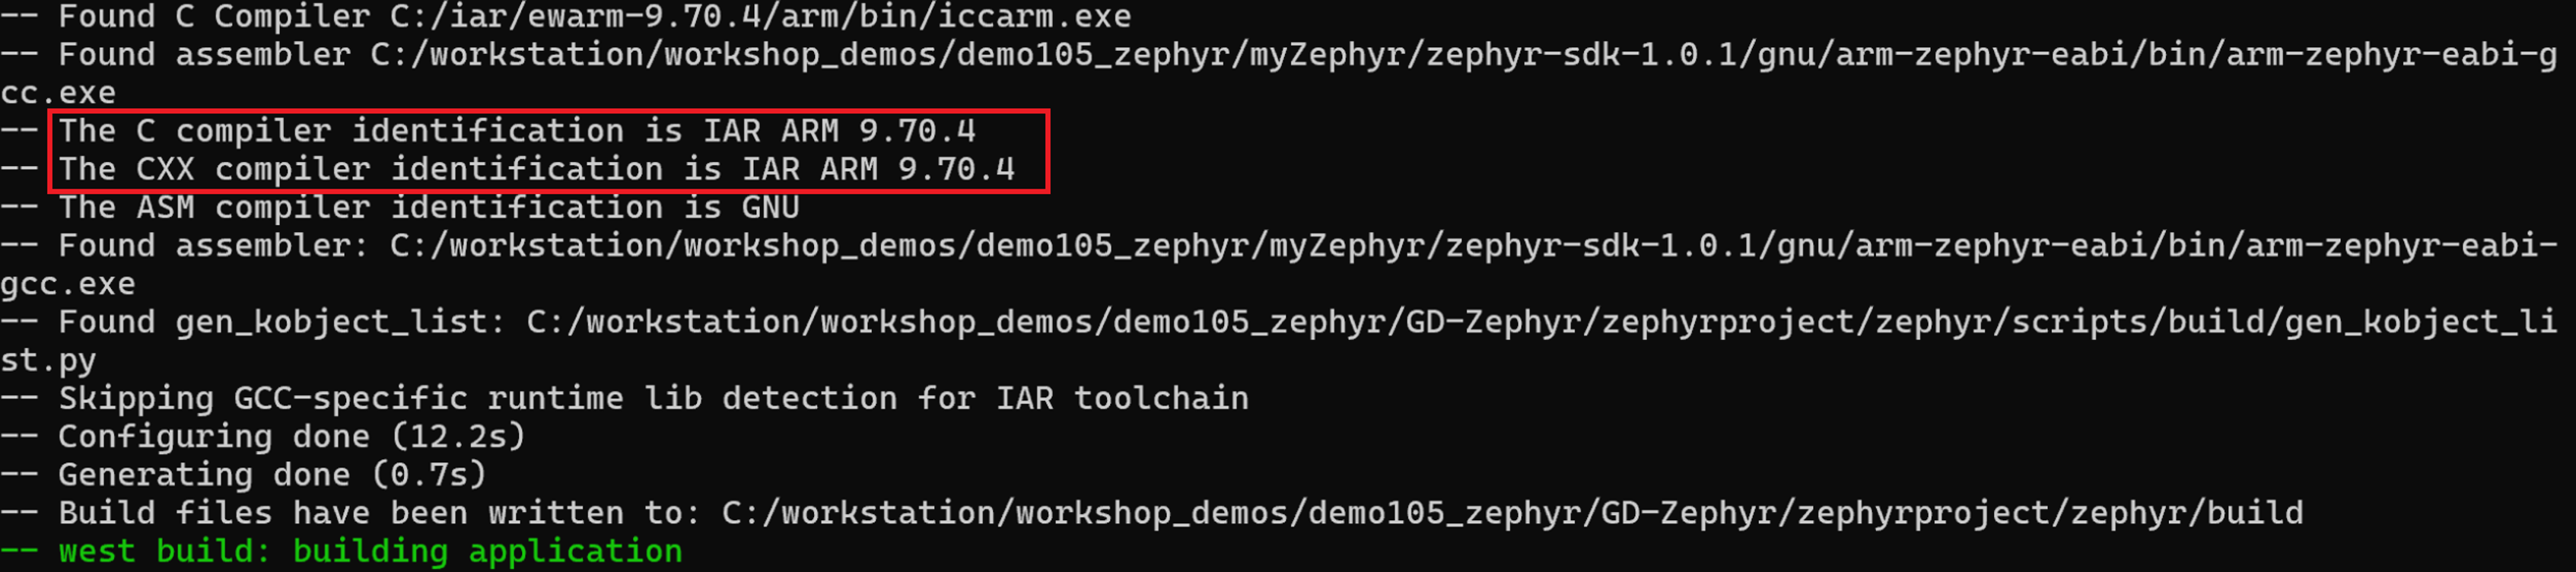
9. 使用IAR工具链进行编译
9.1 配置IAR Arm工具链
# 配置工具链为IAR
$Env:ZEPHYR_TOOLCHAIN_VARIANT="iar"
# 配置IAR工具链安装路径
$Env:IAR_TOOLCHAIN_PATH="C:\iar\ewarm-9.70.4\arm"
9.2 使用IAR Arm工具链构建示例项目
# 构建 Hello World 示例(以 gd32h759i_eval为例)
west build -p always -b gd32h759i_eval samples/hello_world
10. 使用IAR工具链进行调试
在IAR Embedded Workbench for Arm新建对应的调试工程,选择Externally built executable工程类型:

按照readme_external_binary.txt里面的步骤配置对应的调试工程:
- 添加对应的elf文件
- 配置对应的芯片(Options > General Options > Target > Device)
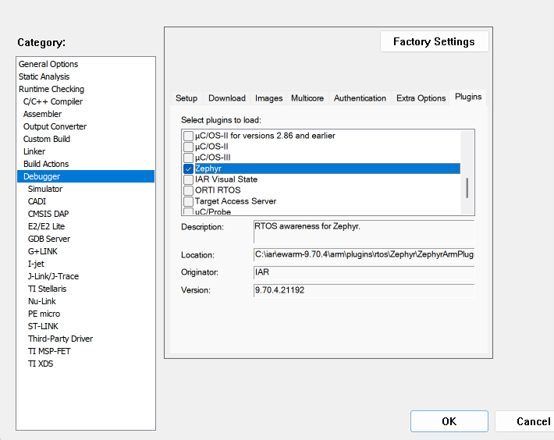
- 配置对应的调试器选项(Options > Debugger > Setup > Driver), 建议勾选Options > Debugger > Plugins里面Zephyr感知调试选项(需要在构建的时候使能CONFIG_DEBUG_THREAD_INFO选项):
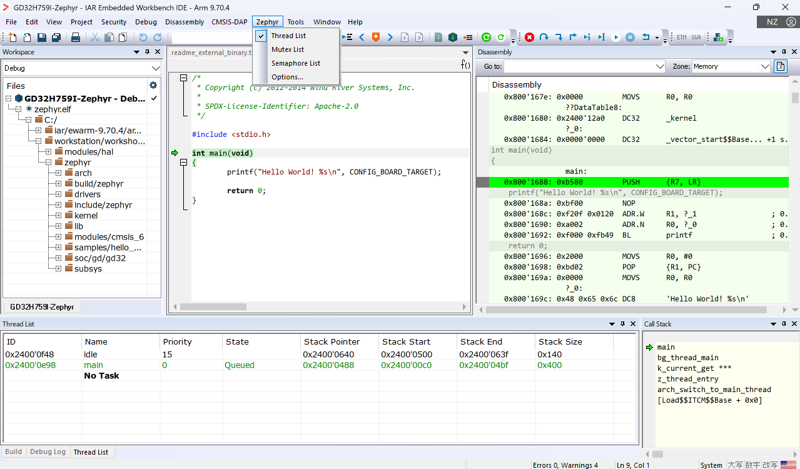
然后就可以进行下载调试了,点击菜单栏中Zephyr的下拉列表可以查看对应Zephyr相关信息:
11. 使用IAR工具链进行静态代码分析
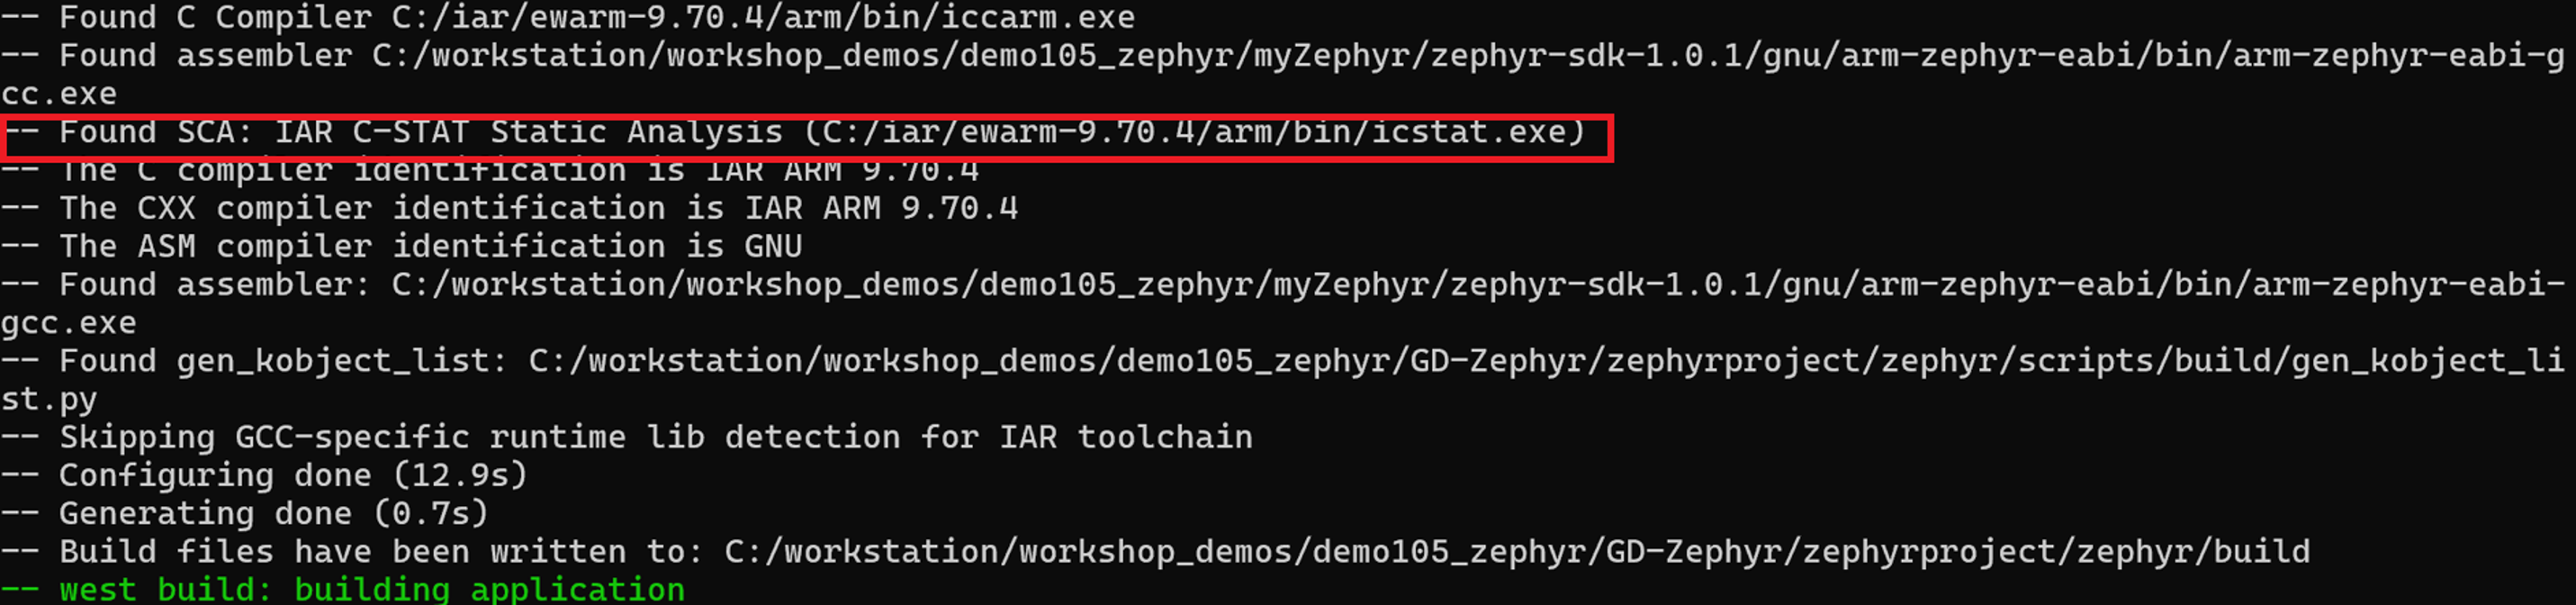
另外IAR Arm工具链集成的静态代码分析工具C-STAT也支持Zephyr静态代码分析,如以下命令:
west build -p always -b gd32h759i_eval samples/hello_world -DZEPHYR_SCA_VARIANT=iar_c_stat

更多信息,可以参考IAR C-STAT support — Zephyr Project Documentation
总结
本文介绍了在windows上如何使用IAR Arm工具链在GD32开发调试Zephyr RTOS。在Linux上同样可以使用相似的步骤使用IAR Arm工具链开发调试Zephyr RTOS。
参考文献:
- https://www.zephyrproject.org/learn-about/
- https://docs.zephyrproject.org/latest/develop/getting_started/index.html
- https://docs.zephyrproject.org/latest/develop/toolchains/iar_arm_toolchain.html
- https://mypages.iar.com/s/article/Debugging-an-externally-built-executable-file?language=en_US
- https://github.com/GD32-MCU-IOT/gd32_zephyr
- https://docs.zephyrproject.org/latest/develop/sca/iar_c_stat.html
- https://www.iar.com/zh/blog/static-code-analysis-in-zephyr-build-safer-cleaner-code-with-iar-c-stat
